Prosciutto Gruyere Tart

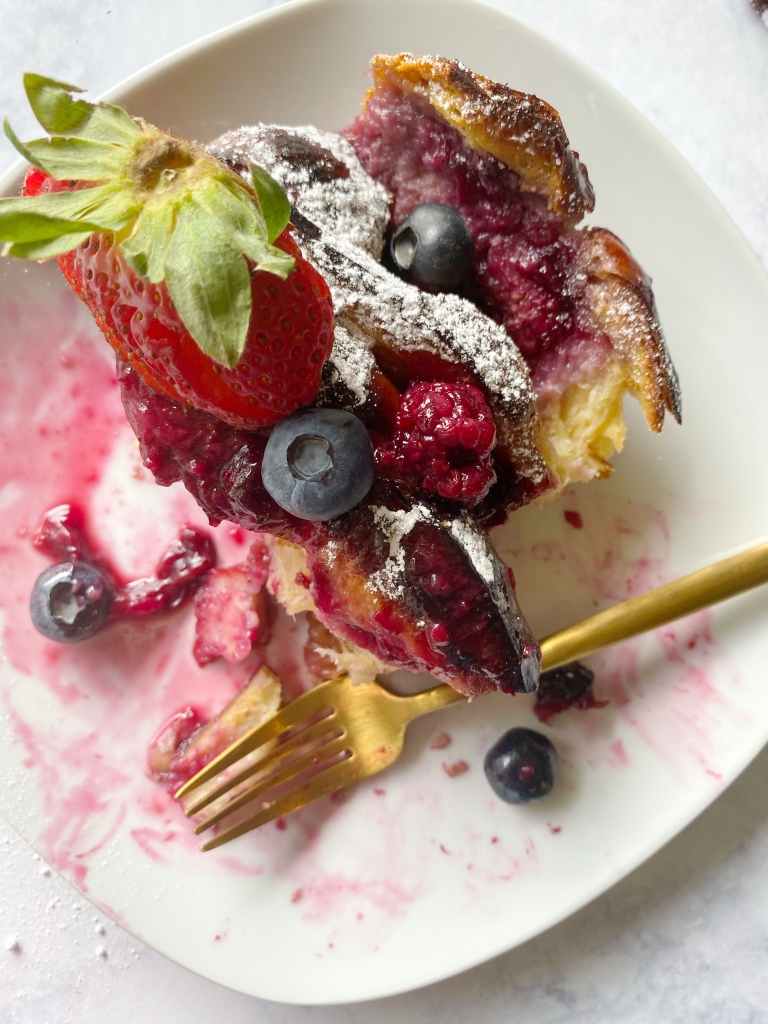
This is perhaps one of the easiest and tastiest things I’ve made over and over again this summer. Simultaneously it also happens to be the thing people are most impressed by. It’s probably the “puff pastry” effect. Needless to say I think this is something you’ll “WOW” your guests with while entertaining this summer.

I’ve also been bringing this with me to parks and lakes for most of my dine al fresco experiences and it’s even better at room temperature. Trust me guys this dish is a winner all the way around! Let’s get started.

Here’s what you’ll need:

1. Béchamel

– 1 cup crème fraîche

-1 large egg

-salt and pepper (to taste) ; I used a roasted garlic salt and fresh cracked pepper

2. Caramelized onions

-2 medium onions sliced thinly

-2 Tbsp olive oil

-1 Tbsp balsamic vinegar

-1 tsp brown sugar

-salt & pepper to taste

3. Toppings

-1 cup diced prosciutto

-1 cup shredded gruyere cheese

Cooking instructions:

Pre-heat oven to 400°F

Onions – Heat the olive oil in a pan on medium heat. Then add your sliced onions. We’re going to turn the heat down to medium low. Making caramelized onions takes some time so we’re cooking them low and slow. Once the onions have softened and are translucent (this should happen after 10 minutes of cooking) add your brown sugar and balsamic vinegar.

Let the onions cook on med low for about 20 more minutes. Make sure to stir them often so that they don’t burn or stick to the pan. Once they are cooled you should remove them from the pan and place them in a bowl to cool.

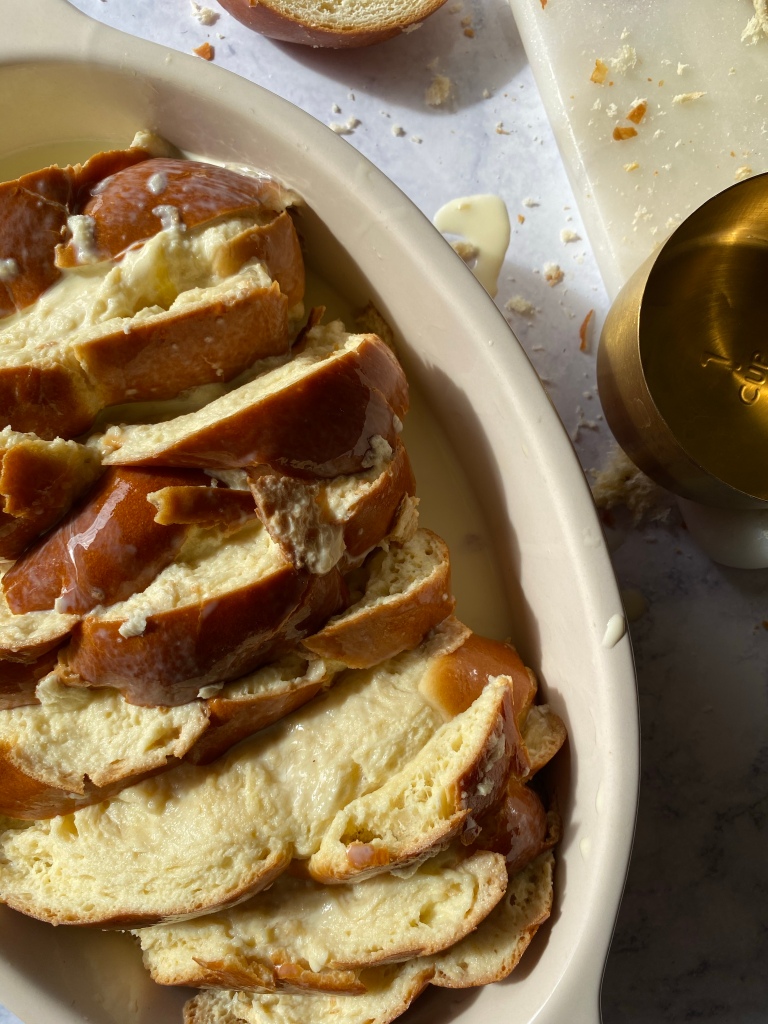
Béchamel – In a bowl mix the crème fraîche, egg, salt & pepper well to combine. That’s it for the béchamel.

Assembly – Unfold the puff pastry and lay it flat on a sheet pan. First spread the béchamel from edge to edge of the pastry. It’s delicious so go as heavy handed or light handed as you like. Then add the Gruyere. Top it off with the prosciutto. I like to add fresh cracked black pepper to the top but that’s optional.

Into the 400°F oven for 25 minutes. When you remove the pastry from the oven it will be puffy like a pillow. Let it cool, it will deflate. Once cooled for 10 minutes it’s good to enjoy!

Here’s a nice little video so you can see how it should turn out!

I hope you guys try this dish and if you do tag me on Instagram @CookingWithRoxy.

I love you all and as always sending lots of moxie your way.

-Roxy

Smoked Salmon & Asparagus Quiche

Look at this beauty! I promise it tastes just as good as it looks. I’m on a mission to make the most fanciest sounding dishes easy to make. Summer is around the corner and we will be dining al fresco quite a bit, so here’s a recipe to add to our menu for summer eats.

Here’s what we’ll need:

Crust:

(1) 26 oz bag of shredded hash brown (defrosted and squeezed dry)

1 tsp paprika

3/4 tsp seasoned salt

1/2 tsp garlic roasted salt

1/4 tsp black pepper

1 1/2 cups cheese

Filling:

6 eggs

1/2 cup diced smoked salmon

2 Tbsp thinly sliced green onion

1/2 tsp onion salt

1/8 tsp black pepper

1/4 tsp crushed red

3/4 cup heavy cream

Asparagus:

1/2 tsp olive oil

2 cups of asparagus

1/4 tsp garlic salt

1/8 tsp pepper

Let’s start with the crust. I ended up making too much of the hash brown mixture for the crust so for this recipe I used half of the mixture that was made. Make sure to squeeze all of the water out of your hash browns. Try to get them as dry as possible. Mix all your ingredients together and press it into a greased quiche pan. I used 1tsp of olive oil to grease my dish. I let it sit in the freezer for about 20 minutes. Then preheated the oven to 425°F.

You’ll want to place half of the hash brown mixture into the dish and press it down flat making sure to cover the entire bottom of the dish along with the sides. Sometimes it’s okay to be meticulous in certain areas of cooking, this is one of them. We want to make sure that we don’t have any holes in the crust before pre-baking it. Holes means that our liquid mixture may leak through while baking.

We will place the crust into the oven at 425°F for 15 minutes. It should come out looking something like the picture above. Now that our crust in pre-baked we can move on to the filling.

I was a little worried that the asparagus might boil inside the quiche when baking so I pre-sautéed them in 1/4 tsp of oil along with all the seasonings for about 3-4 minutes on med-high heat. They should take on a little color but still be crisp on the inside. Take them out of the pan and set them to the side while we mix our filling.

I recommend whisking the eggs together first making sure that you can no longer see the difference between the whites and the yolks and then whisking in the heavy cream. Once the liquid is whisked together you can then add the asparagus along with the other ingredients. Give them a good mix together and then pour it into your crust. Lower the oven temperature to 375°F.

Into the oven at 375°F. I baked the quiche for 26 minutes. I did peak at it a few times and jiggle it to make sure the middle of the quiche was set. If you give your quiche a jiggle while it’s baking and the middle wiggles, it’s not ready and you should definitely leave it in the oven to continue baking.

Once your quiche is out of the oven it’s best to let it rest until it reaches room temperature. I let mine rest for about 20 minutes. I topped it with crème fraîche and chives and it was the perfect addition. If you’re wondering how the crust looks…

It’s perfect!

I hope you guys try this recipe and if you do feel free to tell me what you liked about it! You can always tag me on Instagram @CookingWithRoxy. I love you all and as always sending lots of moxie your way!

-Roxy

Steak Diane | CookingWithRoxy

You know what I’ve realized? I don’t have enough “fancy” dishes to present at my dinner parties. So I’ve decided that I’m going to focus on creating a couple crowd pleasers. This steak Diane is guaranteed to keep your guests talking after a fantastic party! Let’s get started!

There’s a little bit of prep that is optional. I like to salt my steaks/beef overnight. In my opinion it keeps the beef very tender and juicy. I used about a 1/2 tsp of table salt distributed evenly all over, wrapped the steak in plastic wrap and left it in the fridge overnight. I had a pretty huge steak, almost 2 lbs so it can take quite a bit of seasoning.

Here’s what we’ll need:

1 tsp Dijon mustard

1/2 tsp favorite steak seasoning

1 tsp 21 seasoning salute (or herbs de Provence or Italian seasoning)

1/4 cup vegetable oil

1 cup sliced baby portobellos

For the Sauce:

1/3 cup beef broth

1/2 tsp Dijon mustard

1/4 cup heavy cream

1 Tbsp cognac (or a little more if you’re feeling a little risky)

In case you’re wondering what steak seasoning I use and also if you’re not sure what 21 Seasoning Salute looks like.

To prep my steak, I salted it with a 1/2 tsp of table salt the nice before. I made sure to blot extra moisture from the surface of the steak before preparing it for the seasonings.

I spread 1 tsp of Dijon mustard all over the steak and then coated it in the steak seasoning and salute seasoning. I would just like to make sure I take the time to say that how much steak seasoning you use really depends on how salty the brand is that you’re using.

Once our steak is seasoned you’ll add your vegetable oil into the pan on med/high heat. It is CRUCIAL that we get the oil very hot. Right when your oil starts to smoke a little add your steak into the pan. We want to ensure we get a great crust on this steak. I left my steak alone in the pan for 4 minutes before flipping it to the other side. After we let the other side sear for 4 more minutes let’s remove the steak from the pan and leave it to rest on a plate.

Pour most of the oil out of the pan into a heat safe dish. Keep about 1/2 tsp of the remaining oil to sauté your mushrooms with. Now because there was a lot of leftover seasoning in my pan I didn’t feel the need to season the mushrooms with any additional salt components. However, once your mushroom are nice and brown and soft go ahead and add your beef stock, heavy cream, cognac and Dijon to the pan and THEN taste for seasoning. If you need additional salt you can add some here.

Let your sauce cook and reduce for about 2-3 minutes or until your desired thickness.

I like to add my steak and any juices collected on the plate back to my pan and let it finish cooking in the sauce for about 2-3 minutes.

Then slice up your steak and serve it up! This is an easy recipe but definitely packed full of flavor and a real crowd pleaser!

I hope you all enjoy this recipe. If you try it tag me on Instagram @CookingWithRoxy. I love you all and as always sending lots of moxie your way.

-Roxy

Red Beans & Rice with Fried Catfish | Slow Cooker Edition

I’ve honestly never stopped dreaming about my trip to New Orleans. Everything, and I do mean EVERYTHING that I ate on that trip was amazing. Especially the red beans & rice with catfish. I decided to make my own rendition here at home. Just a warning this is a flavorful dish so it has a ton of seasonings that we need. I hope you enjoy!

Here’s what we need:

1 16oz bag of red beans (soaked overnight)

1 medium sized ham hock

6 oz andouille sausage (1/2 a pack)

1/2 medium yellow onion (diced)

1 medium bell pepper (diced)

2 tsp smoked paprika

1 tsp beef bouillon

1 Tbsp unsalted Cajun seasoning

1 1/2 tsp cumin

2 tsp salted Cajun seasoning

1 tsp chicken bouillon

1 tsp garlic powder

1 tsp garlic paste

1 tsp onion powder

1/4 black pepper

1/4 tsp cayenne

1/2 tsp oregano

1 bay leaf

2 sprigs of thyme

2 1/2 cups of water

Whew! That was a lot of ingredients, but they are much needed! The best thing about the slow cooker is that you throw everything in the slow cooker, turn it on low and leave it overnight. They should be ready when you wake up the next day but I set mine overnight and went to work the next day.

I then took about 1 cup of the beans and blended them. I wanted a thicker texture. This step is completely optional. After blending 1 cup of the beans I added it back to the batch and they were complete and ready to eat. I served them with white rice and catfish.

I didn’t forget to tell you how to make this beautiful golden fried catfish lol!

What we need:

2 medium sized catfish filets

2 tsp yellow mustard

1 tsp hot sauce (I used Old Bay hot sauce…Texas Pete is an NC favorite)

1/2 tsp Cajun seasoning

1/4 tsp Old Bay

You’ll want to season your catfish with those ingredients and set it to the side while you get your seasoned flour (or breader as we call it) together.

2 cups of all purpose flour

1/2 tsp Old Bay

1/2 tsp salted Cajun seasoning

1/4 tsp seasoned salt

In this household cast iron skillet is QUEEN. So I heated up about 4 cups of peanut oil (use vegetable oil if you have a peanut allergy) in my skillet. If you want to gage for temperature I would say go for 370°F so that once you add the fish the temperature will drop to 350°F that’s the optimal temperature for frying fish.

I dredged my seasoned catfish into the flour and once my grease was hot enough I fried them to a beautiful golden brown. This should take about 8 minutes. If you like your fish a little harder you can go a little longer.

Safely remove the fish from the grease onto paper towel to drain and that’s all she wrote!

I have so much joy in my heart from visiting such a beautiful city and participating in the culture. I’m glad that I was able to have a piece of it here at home with me. If you try this recipe make sure to tag me on Instagram @CookingWithRoxy. Enjoy this cozy meal. I love you all and as always sending lots of moxie your way.

-Roxy

Champagne & Berries French Toast Bake

We’ve recently reached 1k followers on Instagram and I can’t tell you how happy this makes me! Thank you all for showing me how much I inspire you all to cook, I’m grateful. Alright, enough of the mushy stuff let’s move on to the food. This champagne & berries French toast bake really did a number on Instagram! I had no choice but to update the blog with exact measurements. Make this delicious and sweet dish for a cozy Valentine’s Day morning in or make it for any brunch day that you deem fit LOL!

1. Berry Sauce

1 cup blueberries

1 cup blackberries

2 cups strawberries

1 cup champagne

1/4 cup water

1/2 cup sugar

To make the sauce I added all the ingredients to a small sauce pot. I made sure to cut the strawberries in quarters so that they would be roughly the same size as the berries. Set the sauce on medium heat to start bubbling. While I wait on this to happen I preheat the oven to 350°F. I check on the mixture periodically to stir it and make sure it’s not sticking to the bottom of the pot. If you’re more comfortable cooking the mixture on medium low this also works for my readers who get a bit distracted while cooking LOL!

2. Custard

2 cups half n half

2 eggs and 1 yolk

1/2 cup sugar

1/8 tsp salt

1 tsp vanilla

Whisk the mixture all together until everything is combined. Do your best to make sure you can’t see any egg whites appearing in the mixture.

Beautiful challah bread.

You’ll want your bread slices about 1 inch thick. They’re going to be dunked in custard and I would rather you guys not have soggy French toast. I used one whole loaf of challah for my baking dish. After dunking each slice I place them into the dish on a slant so that you can see each slice. I also poured about a 1/2 cup of the custard into the bottom of the dish.

In case I didn’t describe it good enough here’s a picture of what I meant.

At this point our berry sauce should be done and it should look something like this. I added about 1/4 of a cup between each slice. You can add as much sauce as you’d like. Just remember to make sure that you save some for the top of the dish and a little extra for your portion.

After adding the sauce between each slice.

Now cover your dish in foil and place it into your 350°F oven for 30 minutes. Then uncover it and bake for 20 minutes. To make the presentation a little nicer I broiled it for just a minute for a little more color. That step is completely optional.

Lastly you’ll want to dust your French toast bake with powdered sugar and some of that delicious berry sauce. Then you’re done! Let’s eat!

As you can see I’ve started eating without you LOL! Let me know if you guys try this recipe! You can tag me on Instagram @CookingWithRoxy. I love you all and as always sending lots of moxie your way.

-Roxy

Spicy Tuna Poké Nachos

If you guys follow me on Instagram then you know that I like to eat good all the time. Whether it be food that I’ve cooked in my own kitchen or food from local places here in North Carolina. I’ve recently had poké nachos from a popular spot in Charlotte and had some of my own ideas on how I could make them at home. Here’s my spin on recreating a restaurant experience at home!

continue reading

Bourbon Peach Cobbler Croissant Sticky Buns | Peach Season

It’s Peach Season guys! The farmers market and grocery stores are overflowing with peaches right now so I figured there’s no time like now to try my hand at baking.

I’m exciting to show y’all this flaky, butter, sweet and sticky dessert. There’s a shortcut in this recipe because I have yet to learn how to make a proper dough. However, this shortcut turned out to be JUST what this recipe needed.

Continue reading

Crispy Garlic Parmesan Wings

I’m all about a crispy wing. I like to toss my wings in sauce most of the time but if the wings aren’t crispy enough the skin can become quite slippery and chewy. This technique leaves the skin crispy and ready for whatever delicious sauce you want. This is one of the most simple dinner time meals as the wings already come seasoned with garlic from the Harris Teeter butcher. However, I like to season my wings even more just because this is a very extra household LOL!

Continue reading